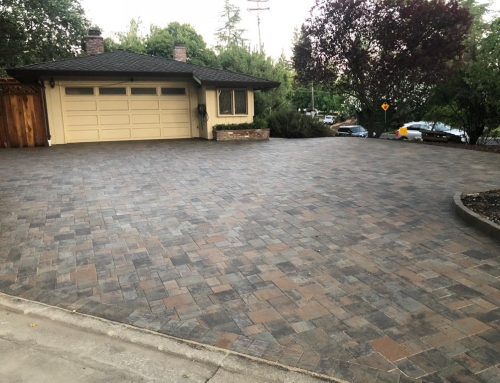
When it comes to transforming your backyard into a functional, stylish, and long-lasting outdoor living space, patio pavers are one of the smartest investments you can make. They’re durable, cost-effective, customizable, and add instant curb appeal. Whether you’re planning a brand-new patio or upgrading an outdated concrete slab, understanding the cost, design trends, installation methods, and maintenance requirements will help you make confident decisions.
This in-depth guide by MySmartscaping walks you through everything you need to know about patio pavers—from types and pricing to installation steps, climate considerations, durability, and whether you should DIY or hire a contractor.
1. Types of Patio Pavers
Before diving into budgets and installation, you need to choose the type of paver that best fits your home’s style, climate, and long-term needs. Here are the most popular patio pavers homeowners choose today:
1. Concrete Pavers
The most widely used option due to affordability and versatility.
Pros:
-
Available in hundreds of shapes, colors, and patterns
-
Durable and strong
-
Easy to replace individually
-
Great for modern, clean-lined patio designs
Cons:
-
Can fade over time without sealing
-
Susceptible to staining
Concrete patio pavers are ideal for homeowners seeking a budget-friendly option without compromising on aesthetics.
2. Brick Pavers
Classic, timeless, and rich in color.
Pros:
-
Extremely durable
-
Natural, elegant appearance
-
Stays colorfast due to clay composition
Cons:
-
Limited size and shape options
-
Options may be slightly pricier
Brick patio pavers work beautifully for traditional homes or historical property styles.
3. Natural Stone Pavers
Premium-grade pavers known for stunning visual appeal.
Common types:
-
Flagstone
-
Bluestone
-
Travertine
-
Slate
-
Granite
Pros:
-
Luxurious look
-
Unmatched durability
-
Excellent heat resistance
Cons:
-
Most expensive option
-
Requires professional installation
For high-end homes, natural stone patio pavers offer a breathtaking finish that lasts decades.
4. Porcelain Pavers
A trending choice among modern homeowners.
Pros:
-
Extremely low maintenance
-
Stain and scratch resistant
-
Perfect for a smooth, contemporary patio
Cons:
-
Needs a strong base
-
Typically requires expert installation
Porcelain patio pavers are excellent for homeowners wanting a sleek, modern look with minimal upkeep.
2. Cost Breakdown of Patio Pavers
The cost of installing patio pavers can vary widely depending on material, labor rates, thickness, base preparation, and design complexity. Below is a comprehensive cost breakdown:
Average Material Costs
| Paver Type | Cost per sq. ft (Material Only) |
|---|---|
| Concrete | $8 – $15 |
| Brick | $10 – $20 |
| Natural Stone | $18 – $45 |
| Porcelain | $20 – $40 |
Factors That Affect Pricing
-
Ground conditions
-
Grading requirements
-
Paver thickness
-
Pattern complexity (herringbone, basket weave, etc.)
-
Choice of edging
-
Additional features (steps, fire pits, drainage)
Understanding these costs will help you build a realistic budget and avoid surprises during your project.
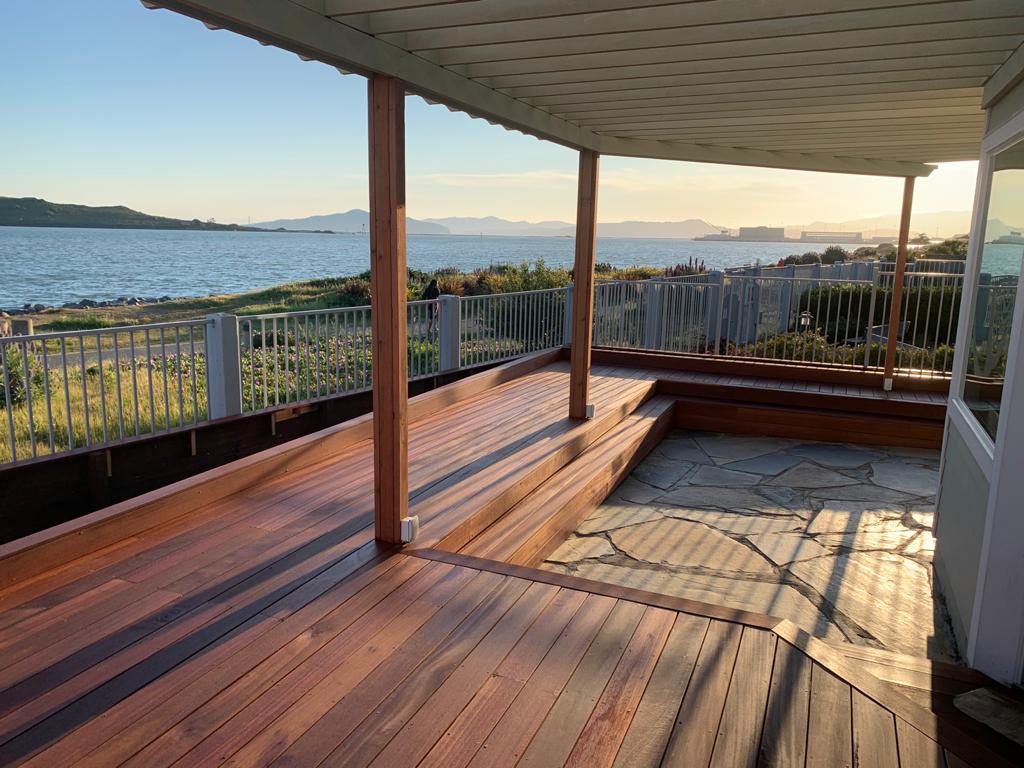
3. Design Trends & Color Options for Patio Pavers
Homeowners today want outdoor spaces that feel like natural extensions of their indoor living areas. Here are the latest design trends in patio pavers:
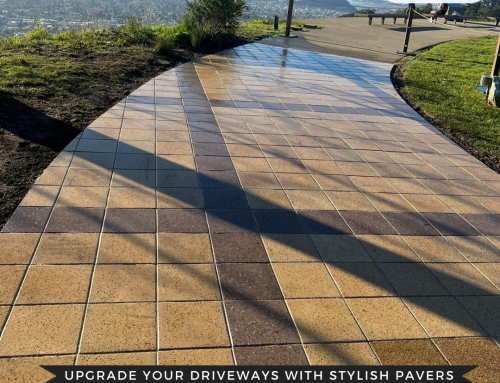
1. Large-Format Pavers
Oversized slabs create a modern, open look. Popular sizes include:
-
24×24
-
24×36
-
30×30
They enhance contemporary backyard layouts.
2. Mixed Texture Combinations
Blending rough textures with smooth surfaces adds visual interest and depth.
3. Neutral & Earth-Tone Colors
Most popular colors:
-
Charcoal
-
Sandstone
-
Tan
-
Gray
-
Terracotta
These tones complement landscaping and home exteriors with ease.
4. Herringbone & Geometric Patterns
A rising trend especially for smaller patios or pathways. These patterns add elegance without overwhelming the space.
5. Fire Pit + Patio Paver Combos
Integrated seating areas built around fire pits are becoming outdoor living essentials.
6. Permeable Patio Pavers
Environmentally-friendly and ideal for drainage—perfect for California’s changing weather patterns.
4. Installation Steps & Ideal Paver Thickness
Installing patio pavers properly ensures long-term durability, performance, and stability. Here’s what a professional installation process typically includes:
Step 1: Site Preparation
-
Marking the area
-
Ensuring proper slope for drainage
-
Removing grass, debris, old concrete, or existing materials
Step 2: Excavation
Typically, professionals dig 6–12 inches deep depending on climate and soil type.
Step 3: Base Layer Installation
A solid base ensures pavers won’t shift.
Layers include:
-
Geotextile fabric
-
4–6 inches of Class II road base
-
2–3 inches of bedding sand
Each layer is compacted thoroughly.
Step 4: Laying the Pavers
-
Starting from a straight edge
-
Following the chosen pattern
-
Using spacers for consistent joints
Step 5: Edge Restraints
These keep the patio secure and prevent pavers from drifting over time.
Step 6: Joint Sand & Compaction
Polymeric sand is swept into joints, then the surface is compacted to lock everything firmly in place.
Ideal Paver Thickness
For patios:
➡ 2″ to 2.5″ thick
Heavier pavers are only required for driveways.
5. Maintenance & Sealing Tips for Patio Pavers
One of the biggest advantages of patio pavers is low maintenance. But a few simple steps can extend their life dramatically.
Routine Maintenance
-
Sweep regularly to remove debris
-
Rinse with a hose to prevent stains
-
Pull weeds early or use joint sand to prevent growth
Deep Cleaning
Use a pressure washer once or twice per year to remove dirt and grime.
Sealing
Sealing enhances longevity and keeps pavers vibrant.
Seal every 2–3 years to:
-
Prevent stains
-
Protect against fading
-
Reduce water absorption
-
Lock joint sand in place
Preventing Shifting
Address soil erosion early and maintain edge restraints.
6. DIY vs Hiring a Contractor for Patio Pavers
Many homeowners wonder whether they should DIY their patio or hire a professional. Here’s the honest breakdown:
DIY Pros
-
Lower upfront cost
-
Full control over design
-
Great for small areas or walkways
DIY Cons
-
Requires heavy tools & equipment
-
Base prep mistakes can lead to shifting and sinking
-
Takes significantly longer
-
No warranty
-
Hard to install complex patterns
DIY is best for smaller, simpler projects.
Hiring a Contractor Pros
-
Perfect base installation ensures longevity
-
Faster project completion
-
Laser-level precision
-
Access to professional tools
-
Warranty on labor and sometimes materials
-
Better drainage and grading outcomes
-
Access to premium paver options
Hiring a Contractor Cons
-
Higher upfront cost
-
Need to vet contractors
However, for patios 200 sq. ft. or larger, hiring an expert provides immense long-term value.
7. Climate-Related Considerations for Patio Pavers
Your climate plays a huge role in how long your patio lasts and what type of pavers you should choose.
1. Hot Climates
Choose:
-
Light colors
-
Natural stone
-
Porcelain pavers
Avoid darker colors—they retain heat.
2. Cold or Freezing Climates
Look for:
-
Freeze-thaw resistant pavers
-
Sealed surfaces
-
Proper drainage layers
3. Wet or Rainy Areas
Best options:
-
Permeable patio pavers
-
Textured surfaces for traction
Make sure the patio slopes properly to avoid water pooling.
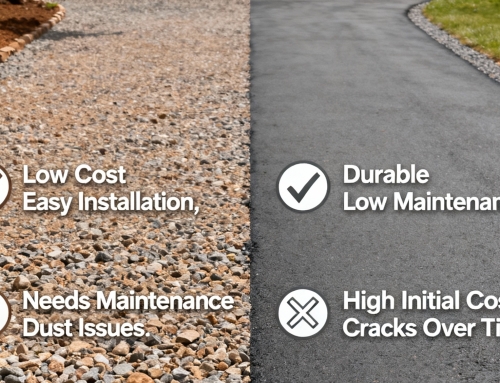
8. Durability & Long-Term Performance of Patio Pavers
One of the biggest advantages of patio pavers over concrete slabs is their durability and repairability.
Why Patio Pavers Are Long-Lasting
-
Pavers flex with soil movement, preventing cracks
-
Individual units can be replaced easily
-
Premium pavers resist UV fading
-
Stronger compression strength than poured concrete
Most patio pavers last 30–50 years with proper maintenance.
Common Durability Factors
-
Quality of base preparation
-
Paver thickness
-
Soil type
-
Drainage
-
Level of foot traffic
-
Climate conditions
Repairability
If a paver settles or shifts, you can lift and reset it—no need to break an entire slab like in concrete patios. This makes maintenance much cheaper in the long term.
Final Thoughts: Are Patio Pavers Worth It?
Absolutely. Whether you’re creating a relaxing outdoor retreat, boosting your home’s value, or designing a family-friendly entertainment zone, patio pavers offer:
✔ unmatched versatility
✔ exceptional durability
✔ endless design potential
✔ low long-term maintenance
✔ excellent ROI on outdoor upgrades
If you want a backyard that’s functional, beautiful, and built to last for decades, patio pavers are one of the best investments you can make.