Pavers are one of the most popular choices for homeowners looking to upgrade their outdoor spaces. Whether you’re dreaming of a new patio, walkway, driveway, or pool deck, pavers offer durability, versatility, and timeless beauty. But before you jump into the project, you probably have a few big questions:
-
How long do pavers take to install?
-
What is the correct way to install pavers?
-
How long should you stay off pavers after installation?
-
How much does it cost to install pavers?
This guide will cover each of these questions in detail and help you understand why hiring an experienced paving contractor is the smartest decision for a flawless finish. We’ll also discuss how pavers compare to concrete driveways so you can make the best choice for your home improvement project.
How Long Do Pavers Take to Install?
One of the first questions homeowners ask is about the timeline. The installation time for pavers depends on the project’s size, complexity, and site conditions. On average:
-
Small patio or walkway (200–400 sq. ft.): 2–4 days
-
Medium-sized driveway (600–1,000 sq. ft.): 4–7 days
-
Large projects (over 1,000 sq. ft.): 1–2 weeks
Factors That Influence Installation Time
-
Site Preparation – Excavation, grading, and base installation can take as much time as laying the actual pavers.
-
Design Complexity – Intricate patterns (like herringbone or circular layouts) take longer than simple running bond patterns.
-
Weather Conditions – Rain delays can slow down progress, while extreme heat makes working conditions difficult.
-
Material Delivery and Access – If your property has limited access or delivery delays, installation may take longer.
Professional vs. DIY Timelines
While a skilled paving contractor can finish most residential projects in under a week, DIY installations often stretch into several weekends. Professionals have the equipment, crew, and expertise to streamline the process and avoid costly mistakes.
The Correct Way to Install Pavers
Pavers are only as strong and beautiful as the foundation beneath them. Poor installation leads to uneven surfaces, shifting, and premature wear. That’s why the correct installation process is critical.
Here’s a breakdown of the professional method most paving contractors follow:
Step 1: Planning and Layout
The contractor measures the space, marks boundaries, and ensures the design aligns with your home’s architecture. Utilities are checked before any digging begins.
Step 2: Excavation
The ground is excavated to a depth of 7–9 inches for patios and walkways and up to 12 inches for concrete driveways and heavy-traffic areas.
Step 3: Base Preparation
A compacted aggregate base (typically crushed stone) is installed in several layers. Each layer is compacted with a plate compactor to create a strong, stable foundation.
Step 4: Sand Bedding
A 1-inch layer of coarse bedding sand is spread evenly. This helps the pavers lock into place.
Step 5: Laying the Pavers
The pavers are placed in the desired pattern with tight joints. Precision cutting ensures a clean edge around borders, steps, or curves.
Step 6: Edge Restraints
Plastic, metal, or concrete restraints are installed around the perimeter to prevent pavers from shifting.
Step 7: Sand and Compaction
Polymeric sand is swept into the joints to lock the pavers. The surface is then compacted again to create a solid, interlocked structure.
Step 8: Final Sealing (Optional)
A sealant may be applied to enhance color, protect against stains, and reduce weed growth.
When done correctly, this process ensures your pavers remain stable and beautiful for decades. Hiring a licensed paving contractor guarantees this level of craftsmanship.
How Long to Stay Off Pavers After Installation?
Another common question homeowners ask is: When can I start using my new paver surface?
The answer depends on whether the pavers were sealed and the type of load the surface will bear.
-
Pedestrian Traffic – For patios, walkways, and pool decks, you can usually walk on pavers immediately after installation. However, waiting 24–48 hours is recommended if sealant was applied.
-
Light Vehicle Traffic – For concrete driveways or parking areas, allow at least 48 hours before driving on the surface. This gives the joint sand and base time to fully settle.
-
Heavy Vehicle Traffic – For trucks or RVs, waiting 72 hours is safer.
The key takeaway: give your pavers time to stabilize before heavy use. A professional paving contractor will provide tailored advice based on your project.
How Much Does It Cost to Install Pavers?
Cost is often the deciding factor in choosing between pavers and concrete driveways. Pavers generally cost more upfront, but they offer higher long-term value thanks to durability and repairability.
Average Costs for Paver Installation
-
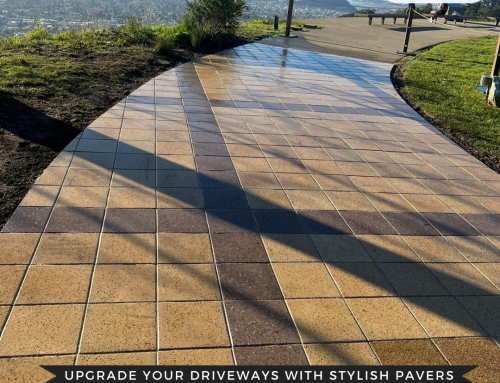
Paver Patios/Walkways: $15–$25 per square foot
-
Paver Driveways: $18–$30 per square foot
For a typical 600-square-foot driveway, you might spend between $10,800 and $18,000.
What Influences Cost?
-
Paver Material – Concrete pavers are more affordable than natural stone.
-
Pattern & Design – Complex patterns increase labor costs.
-
Site Preparation – Grading, excavation, and drainage improvements can add to the price.
-
Access to Site – Difficult-to-reach locations may require extra labor.
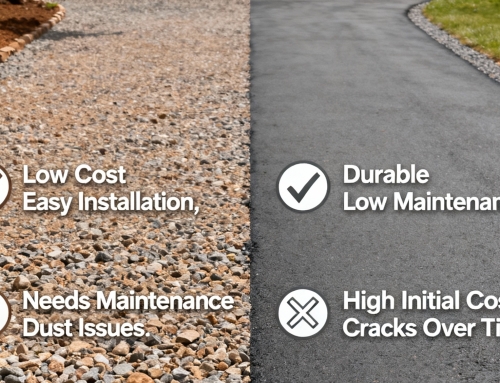
Pavers vs. Concrete Driveways Cost Comparison
-
Concrete Driveways: $8–$12 per square foot
-
Paver Driveways: $18–$30 per square foot
Although pavers cost more upfront, they last longer, resist cracking, and are easier to repair. A cracked concrete driveway usually requires full replacement, while pavers can be individually replaced at a fraction of the cost.
Why Hire a Paving Contractor Instead of DIY?
You might be tempted to tackle a paver project yourself, especially after seeing DIY videos online. But professional installation is worth every penny.
Benefits of Hiring a Professional Paving Contractor
-
Expert Base Preparation – The base determines durability, and contractors know how to compact properly.
-
Precision Installation – Cutting, edging, and joint work require experience to achieve a polished look.
-
Time Savings – What might take you several weekends can be completed in a few days.
-
Warranty & Peace of Mind – Many contractors offer warranties on their work.
When it comes to high-traffic areas like concrete driveways, hiring a professional isn’t just recommended—it’s essential.
Maintenance Tips After Installation
Once your pavers are installed, proper care will extend their lifespan and keep them looking fresh.
-
Sweep Regularly – Prevent dirt and debris buildup.
-
Rinse with Water – Occasional hosing helps maintain color.
-
Replenish Joint Sand – Every few years, add new sand to keep joints strong.
-
Seal the Surface – Sealing every 2–3 years enhances durability and resists stains.
-
Fix Shifts Promptly – If a paver moves, address it early to prevent spreading.
Final Thoughts
Installing pavers is one of the best ways to enhance your outdoor living space, improve curb appeal, and increase property value. While the process involves time, labor, and cost, the results are worth it—especially when handled by an experienced paving contractor.
Here’s a quick recap:
-
Timeline: Most projects take 2–7 days, depending on size and complexity.
-
Correct Installation: Involves excavation, base prep, sand bedding, laying, and compaction.
-
Wait Time: You can usually walk on pavers right away but should wait 24–72 hours for vehicle use.
-
Cost: Expect to pay $15–$30 per square foot, with higher costs for intricate designs.
While concrete driveways remain a cost-effective option, pavers offer unmatched beauty, durability, and ease of repair. For homeowners who want long-lasting results, hiring a professional paving contractor ensures your investment pays off for decades to come.